Choose another division
Electrical semiconductor characterization
Luminescence dating, research, dosimetry and more
Contamination monitor, beta-aerosol monitor, dose rate meter and more
for ultra-fast crystal orientation, crystal alignment in production, quality control, rocking curve measurements, material...
state-of-the-art XRD system for automatic single crystal ingot orientation, tilting and alignment for grinding
Wafer sorting, crystal orientation, resistivity, optical notch and flat determination
Flexible diffractometer for ultra-fast Omega Scan orientation determination
Smart diffractometer for ultra-fast Omega-scan of small samples.
Robust XRD equipment for fully automated in-line testing & alignment
for blanks, wafers & bars (AT, SC, TF, etc.)
three generations of X-ray engineers
in industrial production, R&D and more
discover the most convenient way of measuring orientation of single crystals
Mono- and Multi-crystalline wafer lifetime measurement device
Low cost table top lifetime measurement system for characterization of a variety of different silicon samples at different...
Mono- and Multi-crystalline wafer and brick lifetime measurement device
for production and quality control of monocrystalline Si ingots,bricks and wafers
Flexible OEM unit for lifetime measurements at a variety of different samples ranging from mono- to multicrystalline silicon...
for contactless and temperature dependent lifetime and LBIC measurements
High Resolution Resistivity Mapping Tool for process control and quality assurance measurements
The minority carrier life time is sensitive for all kinds of electrically active defects in semiconductors and is therefore...
MDP is an advanced technology with a so far unsurpassed combination of sensitivity, speed and resolution for fab and lab...
High sensitivity, high resolution surface photovoltage (SPV) measurement instrument
High sensitivity, high resolution surface photovoltage spectroscopy (SPS) instrument with a variable energy excitation source...
for quality control of bifacial PERC/PERC+ solar cells and more
portable in field PID tester for solar modules
user friendly and advanced operating software
The PIDcon devices are designed to investigate the PID susceptibility for production monitoring of solar cells as well as tests...
Learn more about the reasons for PID and the how the susceptibility of solar cells, mini modules and encapsulation materials can...
Our quality management system is an integrated process-oriented system with ISO 9001 certification.
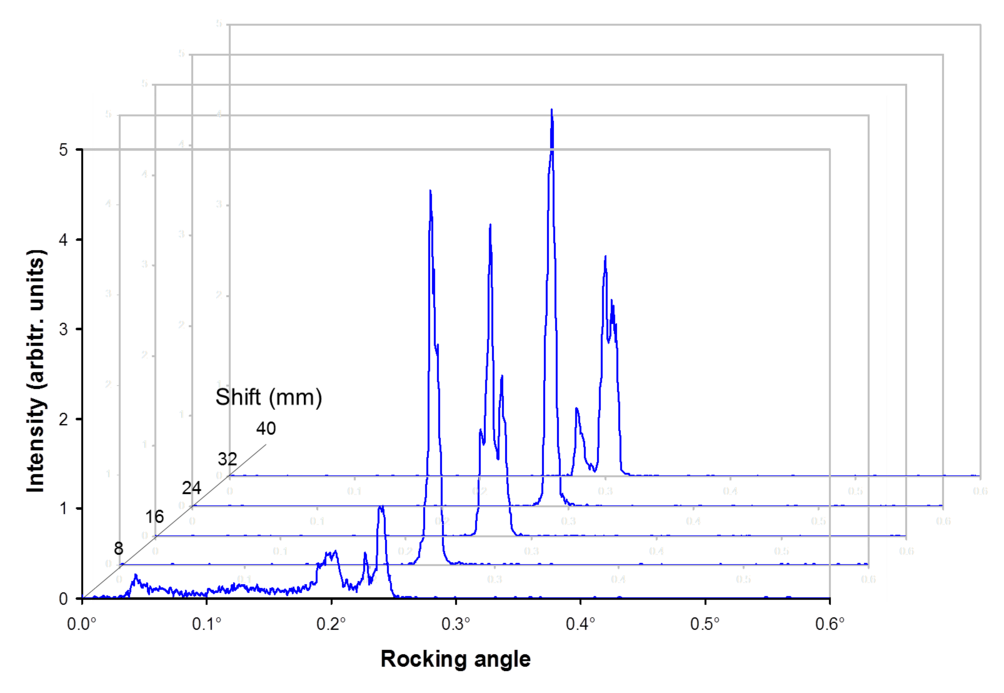
The Rocking Curve of a crystal reflection indicates the quality of the crystalline lattice. This can be down pointwise for fast checking or in combination with a mapping tool to receive a quality map.
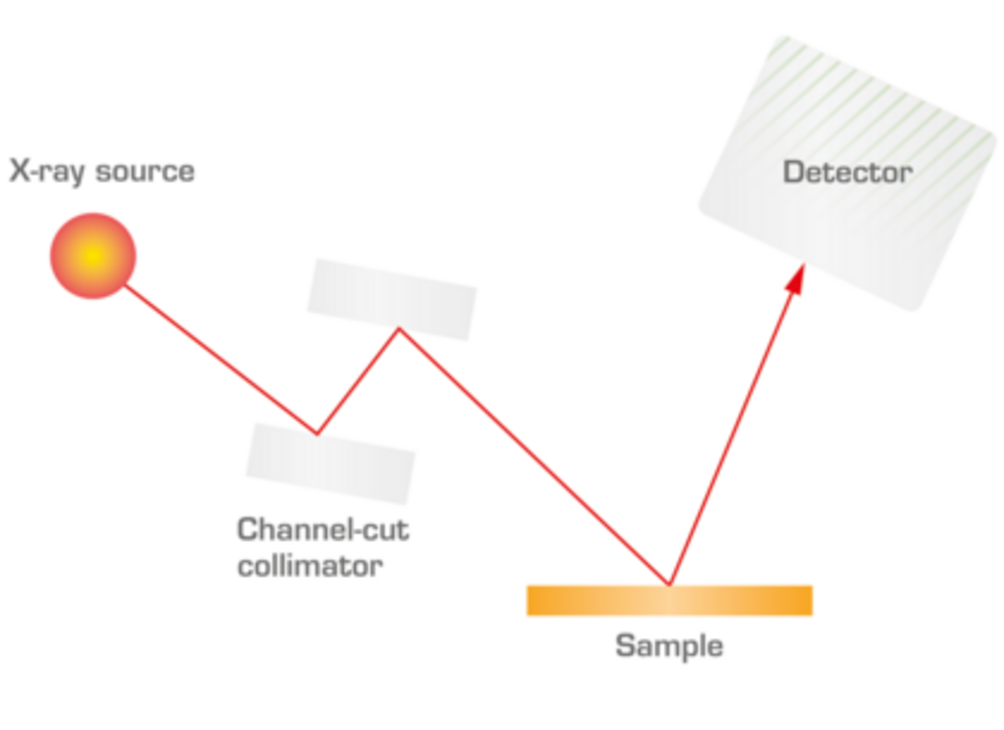
Measuring a Rocking Curve means measuring in Theta-scan mode, which requires a goniometer. A double crystal is brought into the primary beam path to decrease the spectral width and divergency. However, the side effect is a strongly reduced intensity. Therefore, the double crystal is mounted on a retractable holder to be able to switch it "on" or "off".
Rocking curves are primarily used to study defects such as dislocation density, mosaic spread, curvature, misorientation, and inhomogeneity.
In lattice matched thin films, rocking curves can also be used to study layer thickness, superlattice period, strain and composition profile, lattice mismatch, ternary composition, and relaxation.
In a perfect crystal, the width of the rocking curve is determined by the beam geometry and the spectral width of the source. Crystal imperfections cause a broadening of the rocking curve. Usually the half-width of the measured rocking curve is compared to the one calculated assuming a perfect crystal. With our instruments we can reach a minimum half-width of 0.002° (7 seconds).
The quality of a crystal is not exactly measurable. However we can compare measurements on several physical properties to standards for clean and ordered crystals. With XRD, the relevant property is called the Rocking Curve of a reflection.
more
Components built from NLO materials have to fulfill high quality standards at the crystal surface and within the bulk material. The surface quality measurement can be combined with XRD orientation determination in one machine.
µPCD/MDP (QSS)
PID
X-ray diffraction
Projects
Company
This Website uses cookies Our website uses cookies and the web analytics tool Google Analytics according to our privacy policy. By continuing to browse these pages, you agree. If you do not want to collect data from Google Analytics, you can disable this here